

The 7 Stages of Mobile App Development Explained (2026 Guide)
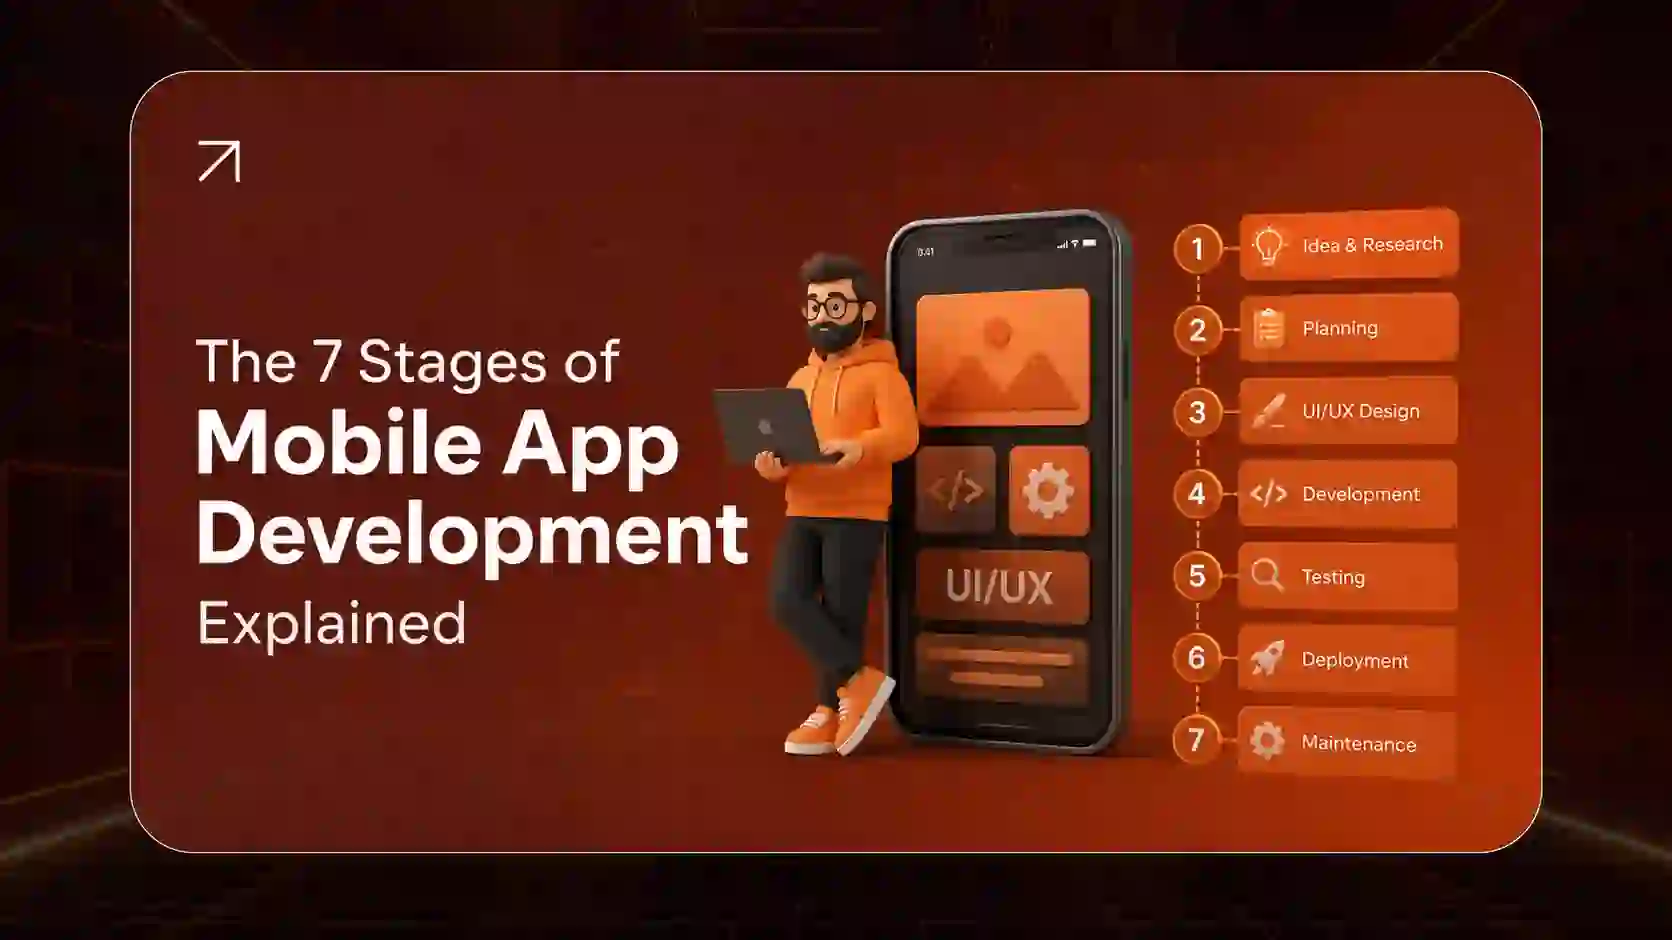
The 7 stages of mobile app development are (1) strategy and idea validation, (2) analysis and planning, (3) UI/UX design, (4) development, (5) quality assurance and testing, (6) deployment and app store launch, and (7) post-launch maintenance and support. Most custom apps move through these phases in 4 to 9 months, and skipping any one of them is the fastest way to blow a budget. Below, you’ll find exactly what happens in each stage, how long it takes, what it costs, and who does the work.
Building a mobile app is not a single act of coding. It’s a repeatable lifecycle, and the teams that ship successful products treat it that way. Whether you’re a founder validating your first idea or an operations lead replacing a clunky internal tool, understanding the mobile app development process gives you leverage: you’ll know what to ask for, what to approve, and when to say no.
This guide walks through all seven stages of app development in plain language, with real timelines, real cost ranges, and the practical decisions that make or break a launch.
What Is Mobile App Development?
Mobile app development is the end-to-end process of designing, building, testing, launching, and maintaining software that runs on smartphones and tablets. It covers everything from the first market research conversation to the crash report you read six months after launch.
The term covers three build approaches:
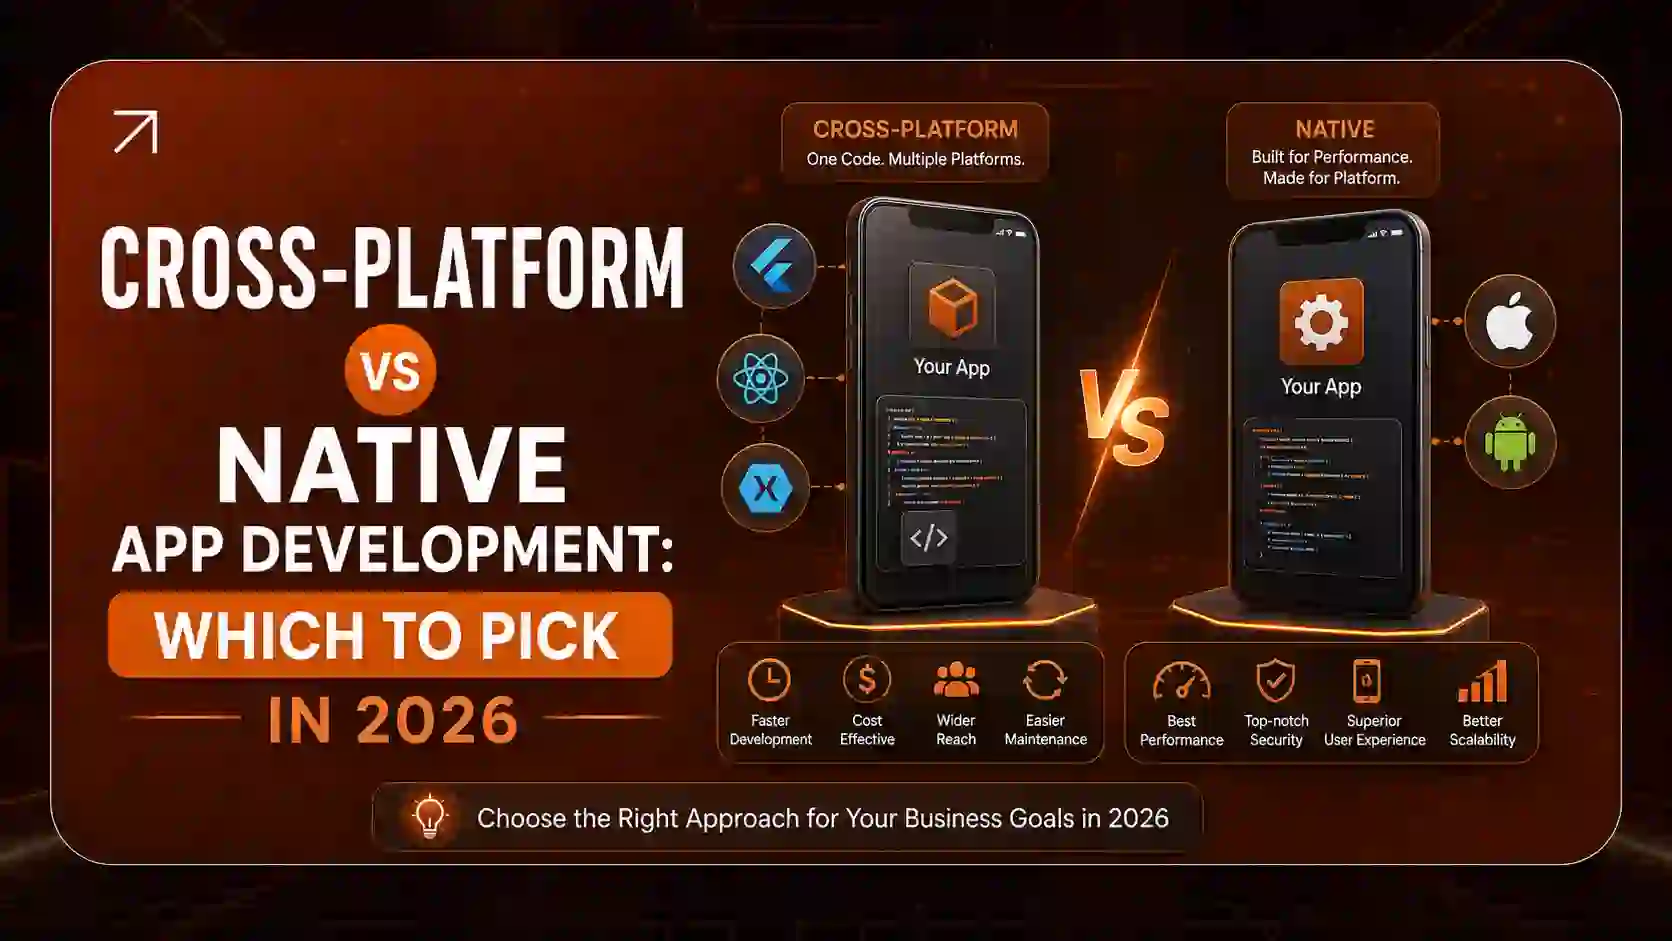
- Native development — separate codebases written in Swift or Objective-C for iOS and Kotlin or Java for Android. Best performance, highest cost.
- Cross-platform development — one codebase serving both platforms using Flutter, React Native, or .NET MAUI. Faster and cheaper, with minor trade-offs on deeply hardware-dependent features.
- Hybrid / web-wrapped apps — web technologies packaged inside a native shell. Cheapest, weakest for performance-heavy use cases.
Mobile app development is a specific expression of the broader software development life cycle, tuned to the constraints of small screens, unreliable networks, battery limits, and two app stores with their own rules.
Why the Mobile App Development Process Matters
Most failed apps don’t fail because the code was bad. They fail because the wrong thing got built, or the right thing got built too slowly.
A defined process protects you in four specific ways:
- It forces validation before spending. Stage 1 is cheap. Stage 4 is not. Finding out your idea has no market during discovery costs you a few thousand dollars. Finding out after launch costs you everything.
- It creates a scope you can price. Vague requirements are the number one driver of change orders and budget overruns.
- It builds in quality gates. Testing isn’t a phase you bolt on at the end. It’s a checkpoint at every stage.
- It plans for life after launch. An app is a living product. Budgeting only to launch day is like buying a car and not budgeting for fuel.
Planning benchmark: For most custom apps, the pre-development stages (strategy, planning, and design) consume roughly 25–35% of the total project timeline. Teams that compress this to “let’s just start coding” almost always pay it back later with interest.
The 7 Stages of Mobile App Development at a Glance
Here is the full mobile app development lifecycle in order, with the primary output of each stage:
- Strategy & Idea Validation → a validated problem, target user, and business case
- Analysis & Planning → requirements document, tech stack, architecture, roadmap
- UI/UX Design → wireframes, mockups, clickable prototype, design system
- Development → working frontend, backend, and APIs, built in sprints
- Quality Assurance & Testing → a stable, secure, tested build
- Deployment & App Store Launch → live listings on the App Store and Google Play
- Post-Launch Maintenance & Support → monitoring, updates, iteration, and scaling
Now let’s break each one down.
Stage 1: What Happens in the Strategy and Idea Validation Stage?
In short: Stage 1 is where you prove the app should exist before anyone writes a line of code. You define the problem, identify the target user, study competitors, and decide what the minimum viable product actually needs to do.
How to validate a mobile app business idea
Validation is not asking your friends if they’d use it. It’s structured evidence gathering:
- Problem interviews. Talk to 15–25 people in your target segment. Ask about their current workflow and what it costs them in time or money. Don’t pitch. Listen.
- Competitor teardown. Download the top five apps solving adjacent problems. Read their one-star and three-star reviews. Those reviews are a free feature roadmap.
- Search and store demand. Check keyword volume and App Store search suggestions to confirm people are actively looking for a solution.
- Willingness to pay. A pre-order page, a waitlist, or a paid pilot tells you more than a hundred survey responses.
Defining your target audience and personas
Write two or three personas covering the user’s role, their goal, their device habits, and the single moment where your app would fit into their day. If you can’t describe that moment in one sentence, the concept isn’t sharp enough yet.
Defining the MVP
The MVP is not a cheap version of the full app. It’s the smallest complete experience that delivers the core value. One core loop, done well.
A useful test: if you removed a feature and the app still solves the primary problem, that feature is not MVP. Our 90-day MVP development guide walks through how to scope this without gutting the product.
Typical duration: 1–3 weeks Key outputs: Product vision statement, personas, competitor analysis, MVP feature list, business model
Stage 2: What Happens in the Analysis and Planning Stage?
In short: Stage 2 converts a validated idea into a technical and commercial plan. You write requirements, choose the tech stack, design the architecture, and build a realistic roadmap with a budget attached.
Writing the requirements document
The Software Requirements Specification (SRS) is the single most valuable document in the entire process. It defines functional requirements (what the app does), non-functional requirements (speed, uptime, security, accessibility), user roles and permissions, third-party integrations, and acceptance criteria.
A good SRS ends arguments before they start. Ours typically runs 20–40 pages for a mid-sized product. See our breakdown of what belongs in a software requirements document.
Native vs cross-platform: which should you choose?
There is no universally correct answer, only a correct answer for your constraints.
Choose native when: you need heavy camera or AR use, complex background processing, tight hardware integration, maximum animation smoothness, or you’re building for a single platform first.
Choose cross-platform when: you need both platforms at launch, your budget is constrained, your feature set is mostly forms, lists, feeds, and API calls, and you want one team maintaining one codebase.
Rule of thumb: Cross-platform typically reduces build cost by 25–40% versus two native codebases, because you’re maintaining one set of business logic instead of two. The savings shrink as the number of platform-specific features grows.
Choosing the tech stack and architecture
The stack decision covers frontend framework, backend language and framework, database, cloud host, authentication provider, and analytics layer. Architecture patterns like MVVM or Clean Architecture keep the codebase testable and maintainable as it grows.
This is also where you decide on infrastructure. Our comparison of cloud vs. on-premise deployment covers the cost and compliance trade-offs, which matter enormously in regulated industries.
Choosing a methodology
Most mobile projects run Agile with two-week sprints, because requirements shift as real users touch real builds. Fixed-scope waterfall still fits certain compliance-heavy or government projects. Our Agile vs. Waterfall comparison explains when each is appropriate.
Typical duration: 2–4 weeks Key outputs: SRS, tech stack decision, system architecture diagram, sprint roadmap, detailed estimate
Stage 3: What Happens in the UI/UX Design Stage?
In short: Stage 3 turns requirements into something people can see and click. It moves from low-fidelity wireframes to high-fidelity mockups to an interactive prototype that gets tested with real users before development begins.
Wireframes vs mockups vs prototypes
These three terms get used interchangeably, and they shouldn’t be:
- Wireframes are grayscale skeletons. They answer “what goes on this screen and where?”
- Mockups are pixel-accurate visual designs with real colors, typography, and imagery. They answer “what does this look like?”
- Prototypes are clickable. They answer “what does this feel like to use?”
Testing a prototype with eight to ten target users will surface more usability problems than three months of internal debate. The Nielsen Norman Group’s usability testing guidance is the standard reference here, and it’s free.
Platform design guidelines
iOS and Android users have different muscle memory. Navigation patterns, back-button behavior, typography scales, and system components differ. Respect both:
Ignoring these guidelines is a common cause of App Store review rejection and, more importantly, of users feeling that an app is “off” without being able to say why.
User journey mapping and onboarding
Map the path from install to first value. The industry term is “time to first value,” and shortening it is the single highest-leverage onboarding improvement available. Every extra screen before the user experiences the core benefit costs you activated users.
The design system
Deliver a reusable component library, not just screens. Buttons, inputs, cards, spacing scales, color tokens, and states. This pays for itself the moment you add feature number eleven.
Typical duration: 3–8 weeks Key outputs: Wireframes, high-fidelity mockups, clickable prototype, design system, developer handoff files
Stage 4: What Happens in the Development Stage?
In short: Stage 4 is the actual build. Frontend engineers construct the screens and interactions, backend engineers build the APIs, database, and business logic, and both are integrated and reviewed in two-week sprints.
Frontend vs backend, explained simply
The frontend is everything the user touches: screens, gestures, animations, local storage, offline behavior.
The backend is everything they don’t: your database, authentication, business rules, payment processing, push notification service, and the APIs connecting the two.
Roughly speaking, backend work often consumes 40–55% of engineering hours on data-heavy apps, even though users never see it. Founders consistently underestimate this. If your app has user accounts, content that syncs, or any admin panel, you’re building a backend product with a mobile face.
Building scalable APIs
Design your API contract before either side starts building. REST or GraphQL, versioned from day one, documented, with clear error codes and pagination. This lets frontend and backend teams work in parallel instead of blocking each other.
If you’re connecting to existing systems, CRMs, payment processors, or ERPs, our API integration services guide covers the common failure points.
Security during development, not after
Security built in at Stage 4 costs a fraction of security retrofitted at Stage 7. At minimum:
- Encrypt data at rest and in transit (TLS 1.2+)
- Use OAuth 2.0 or OIDC for authentication, never roll your own
- Store tokens in the platform keychain or keystore, never in plain preferences
- Implement certificate pinning for sensitive apps
- Never ship API keys or secrets inside the app bundle
The OWASP Mobile Top 10 is the definitive checklist and should be reviewed by your lead engineer at the start of every project. For healthcare or financial products, add regulatory requirements on top: see our guides on healthcare software development and fintech regulatory compliance.
How sprints actually run
A typical two-week sprint: planning on day one, daily standups, continuous code review via pull requests, a demo build to stakeholders on day ten, retrospective, repeat. You should be able to install and use a real build of your app within the first month of development, even if it only does one thing.
If you’re working with a distributed team, our guide on managing remote software development teams covers the communication cadence that keeps sprints honest.
Typical duration: 8–24 weeks depending on scope Key outputs: Working iOS and Android builds, backend and APIs, admin panel, technical documentation
Stage 5: What Happens in the Testing Stage of App Development?
In short: Stage 5 is quality assurance. QA engineers verify the app against requirements across functional, usability, performance, security, and device-compatibility testing, then run a beta with real users before public release.
Types of mobile app testing
- Functional testing — does every feature do what the requirements say?
- Usability testing — can a first-time user complete the core task without help?
- Compatibility testing — does it work on older devices, small screens, tablets, and the last two or three OS versions?
- Performance testing — launch time, scroll smoothness, memory use, battery drain, behavior on 3G and offline
- Security testing — penetration testing, dependency scanning, permission auditing
- Load testing — does the backend survive your launch-day traffic spike?
- Regression testing — did this week’s fix break last week’s feature?
Manual vs automated testing
Automate the repetitive and stable: unit tests, API tests, critical-path UI flows. Keep humans on the exploratory, the visual, and the emotional. A test suite will confirm the button works. Only a person will tell you the button feels wrong.
Our software testing best practices guide covers building a test pyramid that doesn’t collapse under its own weight.
Beta testing on both platforms
Distribute pre-release builds through TestFlight for iOS and the Google Play testing tracks for Android. Recruit 30–100 real users from your target segment, not colleagues. Instrument the build with analytics and crash reporting so you get data, not just opinions.
Practical tip: Fix crashes and blockers before launch, but resist fixing every cosmetic complaint. A perpetual beta is a launch that never happens. Set a bug-severity threshold in advance and ship when it’s met.
Typical duration: 3–6 weeks, overlapping with development Key outputs: Test plan, bug reports, automated test suite, signed-off release candidate
Stage 6: What Happens in the Deployment and App Store Launch Stage?
In short: Stage 6 is publishing. You prepare store listings, submit builds to the Apple App Store and Google Play, pass review, and execute a launch plan with App Store Optimization already in place.
Publishing to the Apple App Store
You’ll need an Apple Developer Program account, an App Store Connect listing, screenshots for required device sizes, a privacy policy URL, a completed App Privacy questionnaire, and a build uploaded via Xcode or Transporter. Review times vary but commonly run from under a day to a few days.
Read the App Store Review Guidelines before you build, not before you submit. Several of the most common rejections are architectural, not cosmetic.
Publishing to Google Play
You’ll need a Google Play Console account, a signed app bundle (AAB), store listing assets, a data safety declaration, and target API level compliance. Google’s publishing documentation is the authoritative source, and its policies update regularly.
Common reasons apps get rejected
- Broken links, placeholder content, or crashes on first launch
- Missing or inaccurate privacy disclosures
- Requesting permissions the app doesn’t visibly need
- Sign-in walls with no way to see value first
- Payment flows that bypass in-app purchase rules for digital goods
- Insufficient app functionality, essentially a repackaged website
App Store Optimization (ASO) at launch
Your store listing is a search results page. Treat it that way:
- Put your primary keyword in the app title and subtitle
- Use all 100 characters of the iOS keyword field, no duplicates, no spaces after commas
- Lead with a benefit-driven first screenshot, since most users never swipe past the first two
- Write a first-line description that works as a standalone value proposition
- Localize listings for your top markets
- Prompt for ratings after a positive moment, never on first launch
ASO and web search work together. A supporting landing page, indexed and fast, captures demand that never reaches the store. If you need help with that layer, our SEO services and Core Web Vitals guide are good starting points.
Typical duration: 1–3 weeks Key outputs: Live App Store and Google Play listings, ASO assets, launch analytics dashboard, marketing site
Stage 7: What Happens After Launch? Maintenance and Support
In short: Stage 7 is ongoing. You monitor crashes and performance, ship OS compatibility updates, fix bugs, analyze user behavior, and iterate on the roadmap. Maintenance is permanent, not optional.
What maintenance actually includes
- Mandatory updates: iOS and Android ship major versions annually. Falling behind on target API levels can get your app delisted.
- Bug fixes and crash resolution
- Security patching: third-party libraries develop vulnerabilities constantly
- Infrastructure: server costs, database scaling, monitoring
- Feature iteration based on real usage data
Budgeting rule: Plan for annual maintenance of roughly 15–25% of your original build cost. An app that cost $120,000 to build will typically need $18,000–$30,000 a year to stay healthy. This number is not negotiable with reality, only with yourself.
KPIs worth tracking
Vanity metrics like total downloads tell you almost nothing. Track instead:
- Day 1, Day 7, and Day 30 retention — the clearest signal of product-market fit
- Activation rate — the percentage of installs that complete your core action
- Crash-free user rate — target 99.5% or better
- Session length and frequency
- Churn and uninstall rate
- Average revenue per user (ARPU) if you’re monetizing
- App store rating trend, not just the number
Monitoring tools
Instrument before launch, not after. Firebase Crashlytics and Sentry for crash reporting, Firebase Analytics, Amplitude, or Mixpanel for behavioral data, and an APM tool for backend performance. Without instrumentation you’re guessing, and guesses are expensive.
The iteration loop
Read your app store reviews weekly. Watch session recordings. Ship small, ship often. A monthly release cadence keeps momentum without exhausting the team.
Typical duration: Ongoing for the life of the product Key outputs: Release cadence, monitoring dashboards, prioritized roadmap, support process
How Long Does Each Stage of Mobile App Development Take?
Here’s a realistic timeline for a mid-complexity custom app with both iOS and Android at launch:
- Strategy & validation: 1–3 weeks
- Analysis & planning: 2–4 weeks
- UI/UX design: 3–8 weeks
- Development: 8–24 weeks
- QA & testing: 3–6 weeks (largely overlapping with development)
- Deployment & launch: 1–3 weeks
- Maintenance: ongoing
Total to launch: roughly 4 to 9 months. A tightly scoped MVP on a single platform can reach the store in 10–14 weeks. Enterprise apps with complex integrations, compliance requirements, and legacy system connections routinely run 12–18 months.
Our detailed custom software development timeline breaks down what actually drives these numbers.
How Much Does Each Stage of App Development Cost?
US-market cost ranges for a mid-complexity app, expressed as a share of total project cost:
- Strategy & validation: 5–10%
- Analysis & planning: 5–10%
- UI/UX design: 15–20%
- Development: 45–55%
- QA & testing: 10–15%
- Deployment: 3–5%
- Annual maintenance: 15–25% of build cost, every year
In absolute terms, a simple app typically lands between $40,000 and $90,000, a mid-complexity app between $90,000 and $250,000, and an enterprise-grade app above $250,000. Cross-platform builds sit at the lower end of each band.
The biggest cost variables are: number of platforms, backend complexity, third-party integrations, compliance requirements, custom animation, and how many times the scope changes mid-build. For a full breakdown, see our custom software development cost guide for the USA, and if you’re weighing team location, our comparison of offshore, nearshore, and onshore development.
Who Do You Need on a Mobile App Development Team?
A functioning team, whether in-house or partnered, includes:
- Product Manager / Business Analyst — owns scope, requirements, and priorities
- UI/UX Designer — wireframes, visual design, prototypes, design system
- iOS and Android Developers (or cross-platform engineers)
- Backend Developer — APIs, database, server logic
- QA Engineer — test planning and execution
- DevOps Engineer — CI/CD pipelines, environments, releases
- Project Manager / Scrum Master — sprint cadence and communication
Small teams combine roles. A five-person pod can ship a serious MVP. What you can’t safely do is skip QA or run a project with no one owning requirements.
If you need to add specific skills to an existing team rather than outsource the whole project, staff augmentation is often the better structure. Our guide on when to use staff augmentation explains where the line sits.
Common Mistakes That Derail App Projects
Building the full vision instead of the MVP. You will be wrong about at least a third of your assumptions. Find out cheaply.
Treating design as decoration. Design is where you resolve product ambiguity. Changing a screen in Figma takes an hour. Changing it in code takes a week.
Leaving testing until the end. Bugs found in Stage 5 that originated in Stage 2 are the most expensive kind of bug.
No analytics at launch. You get one shot at clean launch-week data. Instrument first.
Budgeting only to launch day. See the 15–25% maintenance rule above.
Choosing a partner on price alone. The cheapest quote is frequently the most expensive project. Our checklist for choosing a software development company in the USA covers the questions worth asking.
A Real-World Walkthrough: From Idea to Launch
Consider a field service company that wants a technician app for job dispatch and photo documentation.
Stage 1 reveals through interviews that technicians don’t need more features, they need offline capability, because half their job sites have no signal. That single insight reshapes the whole build.
Stage 2 produces an SRS specifying offline-first architecture with local storage and background sync, cross-platform via Flutter, and integration with the existing CRM.
Stage 3 delivers a prototype tested with six technicians wearing work gloves. Result: every tap target gets bigger and the photo flow drops from four steps to two.
Stage 4 builds it across eight sprints, with the sync engine consuming more engineering time than every screen combined, exactly as predicted.
Stage 5 finds that sync fails when a device reconnects mid-upload. Caught in beta, fixed in three days. Caught post-launch, it would have meant lost job records and lost trust.
Stage 6 ships to both stores plus enterprise distribution for internal devices.
Stage 7 shows that the photo feature is used four times more than expected, so the next quarter’s roadmap prioritizes photo annotation.
Notice that the winning decision was made in Stage 1, and the near-disaster was caught in Stage 5. That’s what the process is for.
Tools Worth Knowing for Each Stage
- Research and planning: Notion, Confluence, Miro, Jira, Linear
- Design: Figma, Sketch, Adobe XD, Framer
- Development: Xcode, Android Studio, VS Code, Flutter, React Native, Swift, Kotlin
- Backend: Node.js, Django, .NET, Supabase, Firebase, AWS Amplify
- Testing: XCTest, Espresso, Appium, Detox, BrowserStack, Postman
- CI/CD: GitHub Actions, Bitrise, Fastlane, Codemagic
- Analytics and monitoring: Firebase, Amplitude, Mixpanel, Sentry, Crashlytics
Where do no-code and low-code fit? Genuinely well for internal tools, simple directories, event apps, and rapid validation prototypes. Poorly for anything needing custom logic, real scale, offline sync, or eventual white-labeling. Use no-code to test demand in Stage 1, then build properly once demand is proven.
How to Learn Mobile App Development
Free resources: Apple’s official Swift and SwiftUI tutorials, Google’s Android Basics with Compose course, the Flutter documentation and codelabs, freeCodeCamp, and MDN for web fundamentals.
Paid paths: structured bootcamps, Coursera and Udacity specializations, and platform-specific certification tracks.
The honest advice: build three real apps that solve problems you personally have, and ship all three to a store. That teaches you more than any curriculum, because stages 5, 6, and 7 only exist in real projects.
The Future of Mobile App Development
Four shifts are reshaping the process right now:
AI-native features as table stakes. On-device models are making personalization, summarization, and natural language input standard rather than novel. Our guide on AI integration in custom software covers how to add these without inflating scope.
AI-assisted engineering. Code generation is compressing Stage 4, which raises the relative importance of stages 1 through 3. When building gets cheaper, deciding what to build gets more valuable.
Privacy as a design constraint. Tracking restrictions and data-safety disclosures now influence architecture, not just legal copy.
Cross-platform maturity. Flutter and React Native have closed most of the performance gap for typical business applications, making native a deliberate choice rather than a default.
Career outlook: mobile engineering, product design, and QA automation remain in steady demand across US markets, with strong salaries in metro hubs including New York, Orlando, Austin, Seattle, and San Francisco. The roles that are growing fastest are the ones combining engineering with product judgment.
Why Choose Leads 360 LLC for Mobile App Development
Plenty of firms will write code. Fewer will tell you honestly when a feature isn’t worth building.
At Leads 360 LLC, we run all seven stages as a single accountable engagement. That means:
- Discovery before development. We validate and scope before quoting, so the number you get is a number we can hold.
- Senior-led delivery. Your architecture is designed by people who’ve maintained apps for years, not just launched them.
- Design that tests. Prototypes go in front of real users before engineers open an IDE.
- QA as a discipline, not a phase. Automated coverage and manual exploratory testing throughout the build.
- Post-launch partnership. Monitoring, release cadence, and a roadmap that responds to actual usage data.
- Flexible engagement models. Full-project delivery, MVP sprints, or staff augmentation to extend a team you already have.
We work with startups and established US businesses through our custom software development and web development practices, including local teams for Orlando and Florida clients.
You can learn more about our team or explore advanced services at Leads 360 LLC to see the full range of what we deliver.
Frequently Asked Questions
What are the 7 stages of app development? The seven stages are strategy and idea validation, analysis and planning, UI/UX design, development, quality assurance and testing, deployment and app store launch, and post-launch maintenance and support.
What is the first step in mobile app development? Strategy and idea validation. Before any design or code, you define the problem, identify your target users, research competitors, and confirm there’s real demand. This stage is the cheapest place to discover you’re wrong.
How long does it take to develop a mobile app? Most custom apps take 4 to 9 months from kickoff to launch. A focused MVP on one platform can ship in 10 to 14 weeks. Enterprise apps with compliance requirements and legacy integrations often take 12 to 18 months.
How much does it cost to develop an app in 2026? In the US market, simple apps typically cost $40,000–$90,000, mid-complexity apps $90,000–$250,000, and enterprise apps $250,000 and up. Add 15–25% of the build cost annually for maintenance.
What is an MVP in app development? A Minimum Viable Product is the smallest version of your app that fully delivers the core value to users. It’s not a cheap prototype, it’s a complete but narrow product built to test your central assumption with real users.
What comes after app design in the development process? Development. Once designs and the prototype are approved, frontend and backend engineering begins in sprints, with QA testing running in parallel rather than waiting until the end.
Native or cross-platform: which is better for my app? Cross-platform (Flutter or React Native) is the better default for most business apps, cutting build cost by roughly 25–40%. Choose native when you need heavy hardware access, advanced graphics, or maximum performance on a single platform.
Do I need a developer to build an app? For a simple internal tool, directory, or validation prototype, no-code platforms can work. For anything with custom logic, real scale, security requirements, or long-term ownership, you need engineers.
How do I maintain an app after launch? Monitor crashes and performance with tools like Crashlytics or Sentry, ship OS compatibility updates at least annually, patch security dependencies, review analytics and store feedback monthly, and maintain a regular release cadence.
What is App Store Optimization (ASO)? ASO is optimizing your app store listing to rank and convert: keyword-optimized title and subtitle, benefit-led screenshots, a compelling description, localized listings, and an active rating strategy.
Conclusion: Start With the Right Stage
The 7 stages of mobile app development aren’t bureaucracy. They’re a sequence built from decades of expensive lessons about what happens when teams skip steps. Validate before you plan. Plan before you design. Design before you build. Test throughout. Launch deliberately. And budget for the years after launch, because that’s where products actually succeed or quietly die.
If you’re at Stage 1 with an idea, the next step isn’t hiring developers. It’s a discovery conversation that pressure-tests the concept and produces a scope you can actually price.
Book a seat at Advance Services offered by Leads 360 LLC. Contact our team for a free scoping consultation, and we’ll map your app across all seven stages with a realistic timeline and budget before you commit to anything.